This is a fully contained, and Offline, Encounter Tracker. For people that run games off old laptops or don’t want to deal with spotty wifi. The source is open for reading over here. https://github.com/nogasgofast/Adventure_Wrench/
Adventure Wrench is a tool I made for myself. And it does two things.
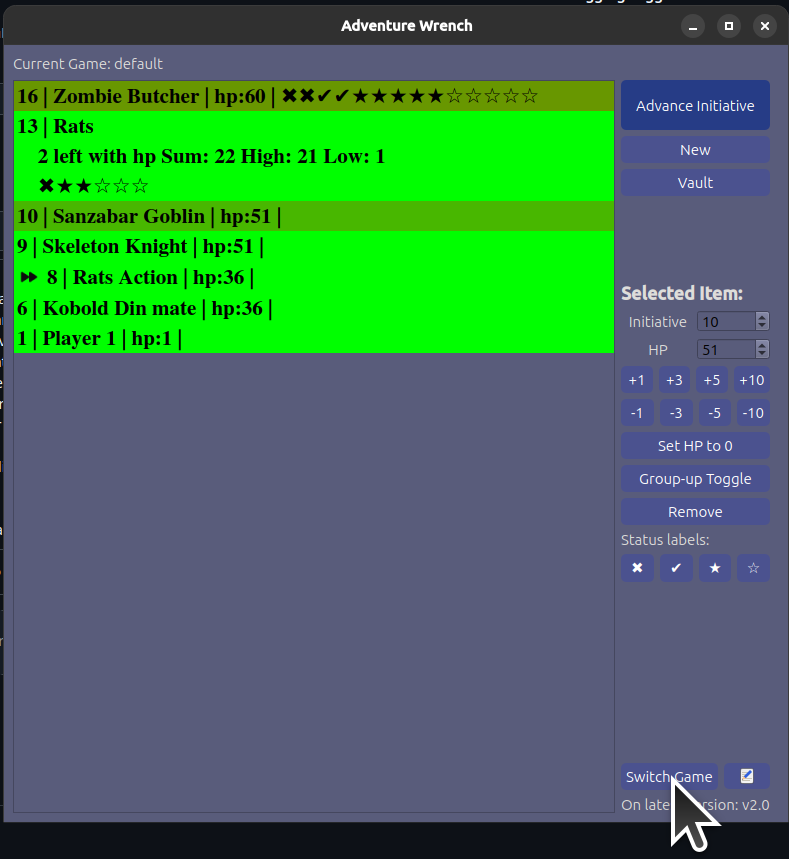
The first thing it does is keep track of the current situation. Tracking turn order via an Initiative number from high to low. As well as allowing you to see stat sheets by just hovering the mouse over lines. For those super quick references.
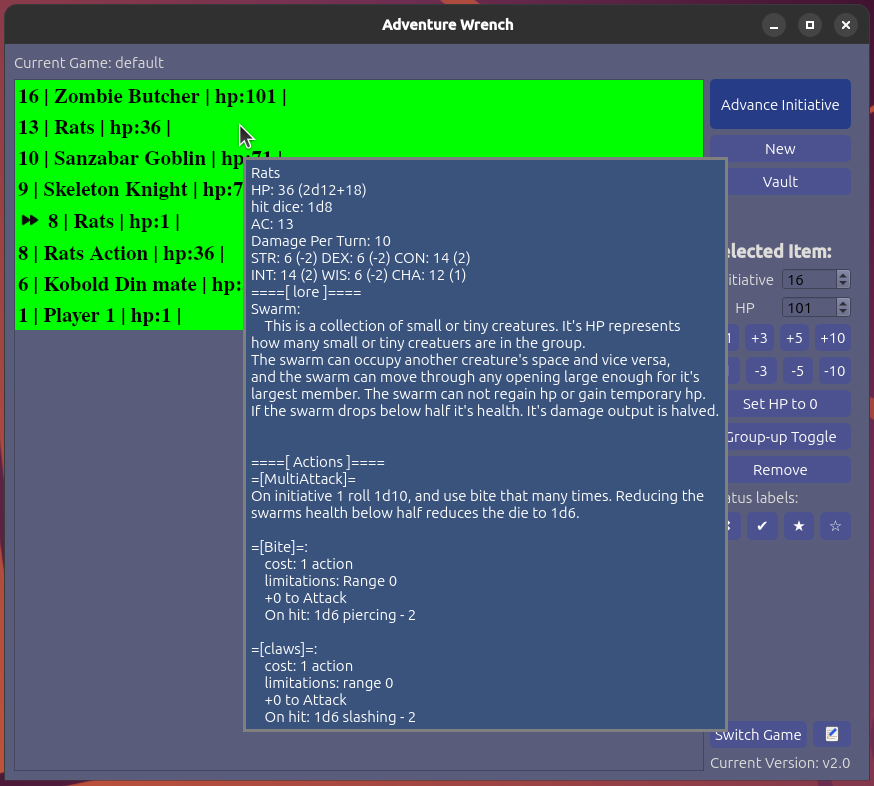
Additionally we can click on the item to get access to it’s stat block for modifying it right here in the initiative tracker.
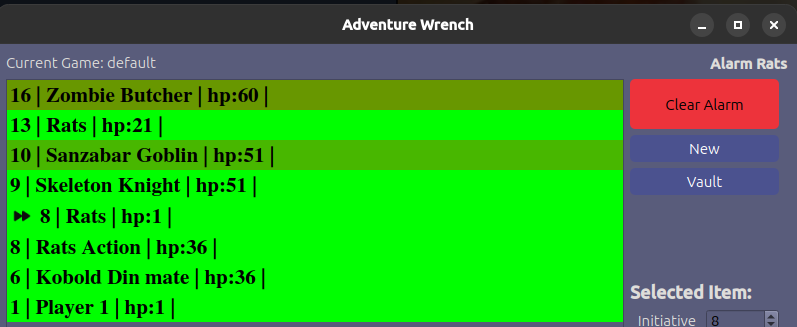
I know what your thinking. “What does alarm do?” Setting the alarm on this entry makes sure every time the turn order advances to this item you get a notice. You can click the Clear Alarm button to continue advancing to the next turn order. The alarm will go off again next time this things turn order appears.
Other features of the initiative tracker wold be the ability to modify the health or initiative of a number of items at the same time. You get full multi-select in this window. And all options work with this type of selection. The options are all under “Selected Item” section. There are boxes to set the Initiative (turn order) and the HP. And quick heal, quick damage buttons.
Sometimes I find that for lots of small creatures you may want to have them act as a group, or deal damage to them and heal them as a group. That’s where the “group up” Toggle button comes in.
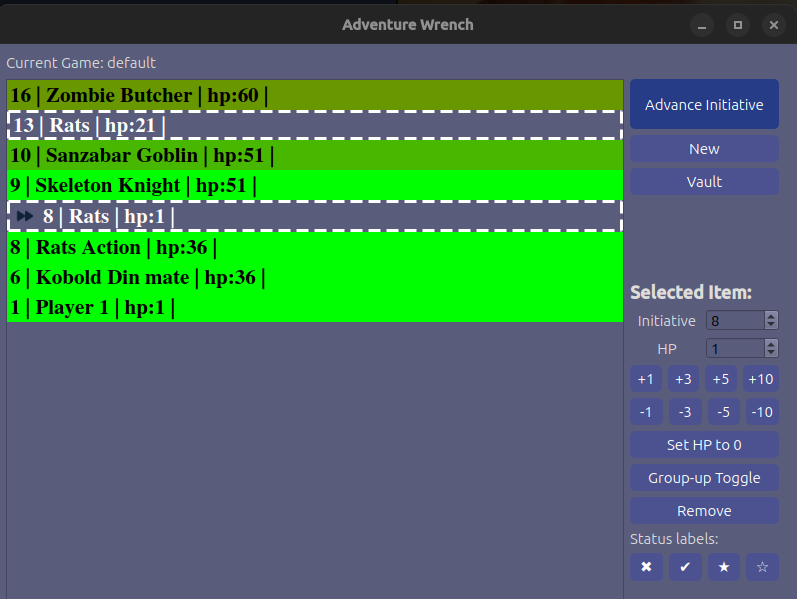
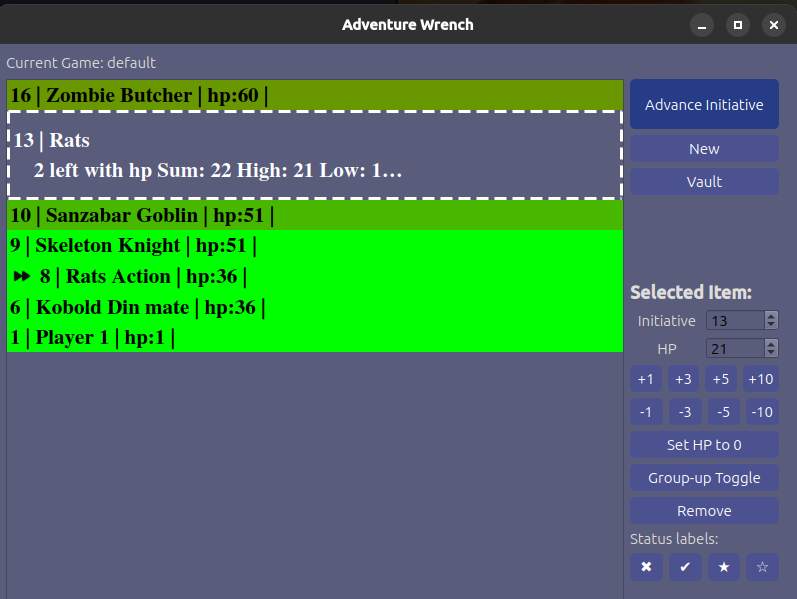
Notice how the turn order indicator. The >> arrows stayed in the right position? Neat. The Group-Up button only works on things with the same name, and it does smash stat-sheets together. So just be aware making heavy use of this feature may erase or change data in the stat blocks if you have been modifying them.
Lastly there are the Status labels. These are meant to track death/saves as well as indicate what status effects are applied. Here is what it looks like when they are all maxed out:

The first two reset the 3rd time you click the button. The other two reset the 6th time you click the button.
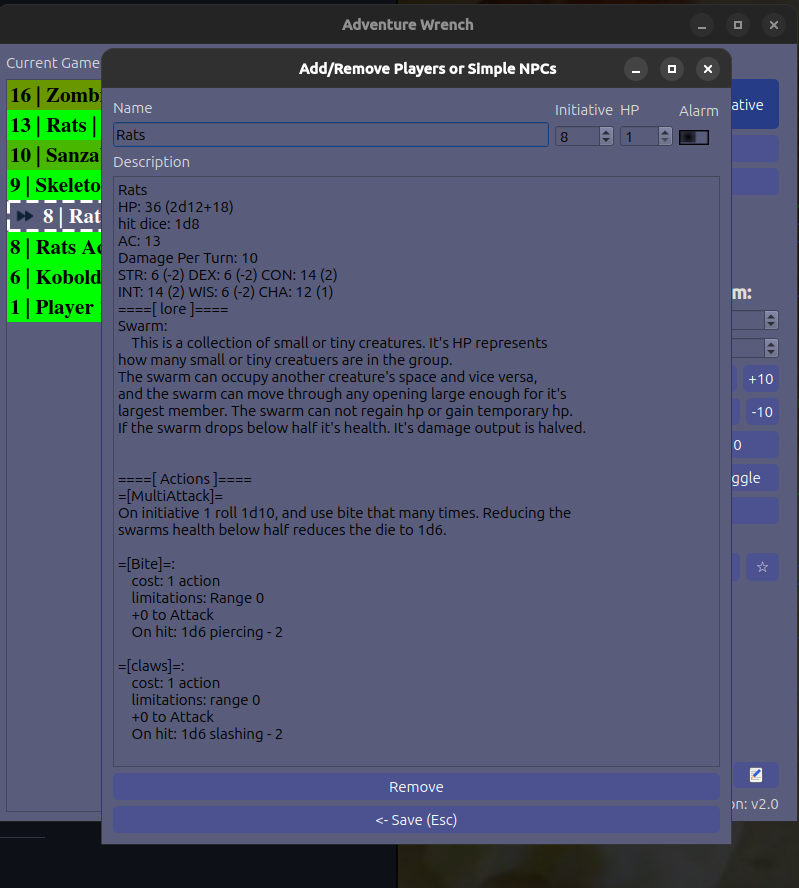
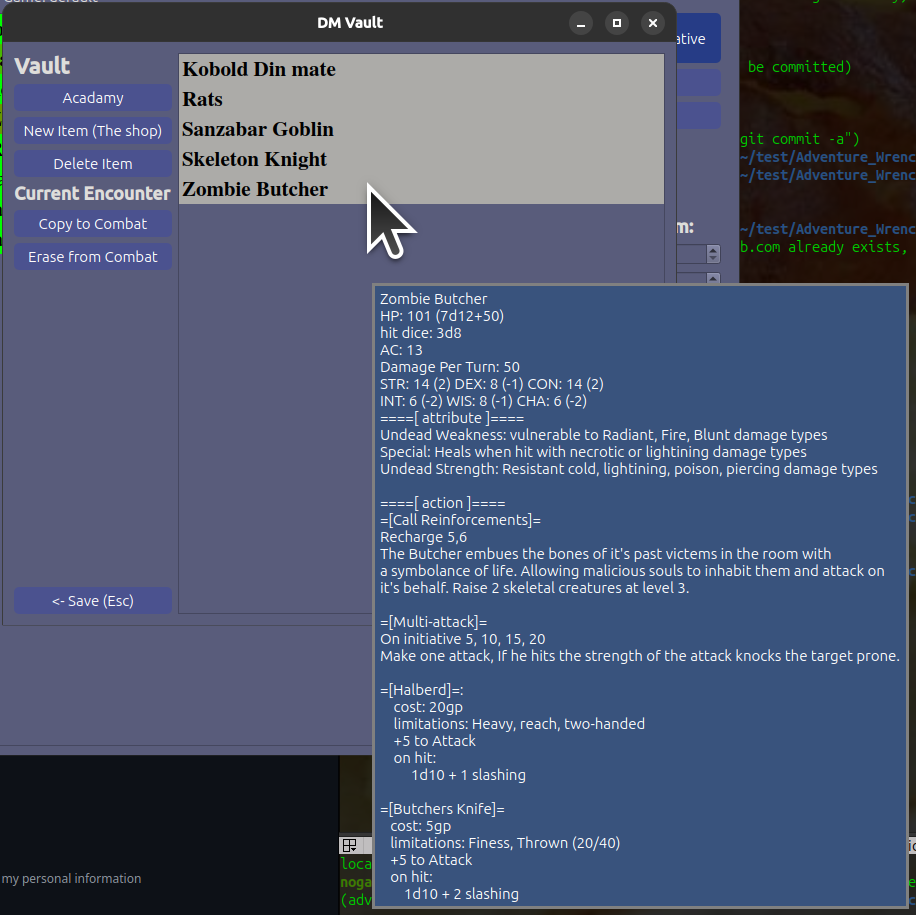
When you click on “Vault” you get a list of items that can be copied or deleted from the Initiative Tracker. Using the “Copy to” and “Erase from” buttons.
These represent npc’s, creatures both specific and general, traps, and treasures. And sometimes lore or places. You can put anything you want into a stat block. Copy text directly in and save it for latter sessions. This is the most straight forward way to use the vault. As a place to store things you want to pop into encounters at a later time.
This program and other Encounter builders approach the problem of building Encounters depth first.
You have to build the axe some character/monster needs first, then the character/monster then the encounter.
I know that in my mind world building is usually accomplished Top Down.
- Events in the world create the encounter.
- Environment determines what characters/monsters will be there.
- The individual weapons abilities are determined by who/what is being encountered.
This is the problem i set out to solve with this application. And I did that by introducing the idea of Templates.
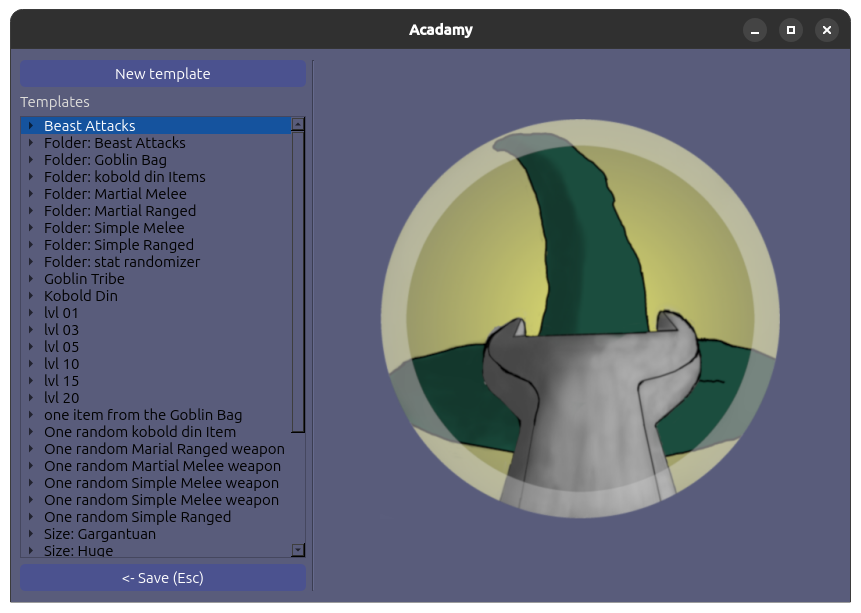
Because a template can be a general rule. Like “swamp creatures have poison attacks and weapons.” We can start to think of encounter building and world building as a set of increasingly specific rules.
That should allow us to build Top down in templates. Templates can Incorporate other templates. So we can stack general rules into specific ones.
Here is an example making something that can be applied to any species of creature:
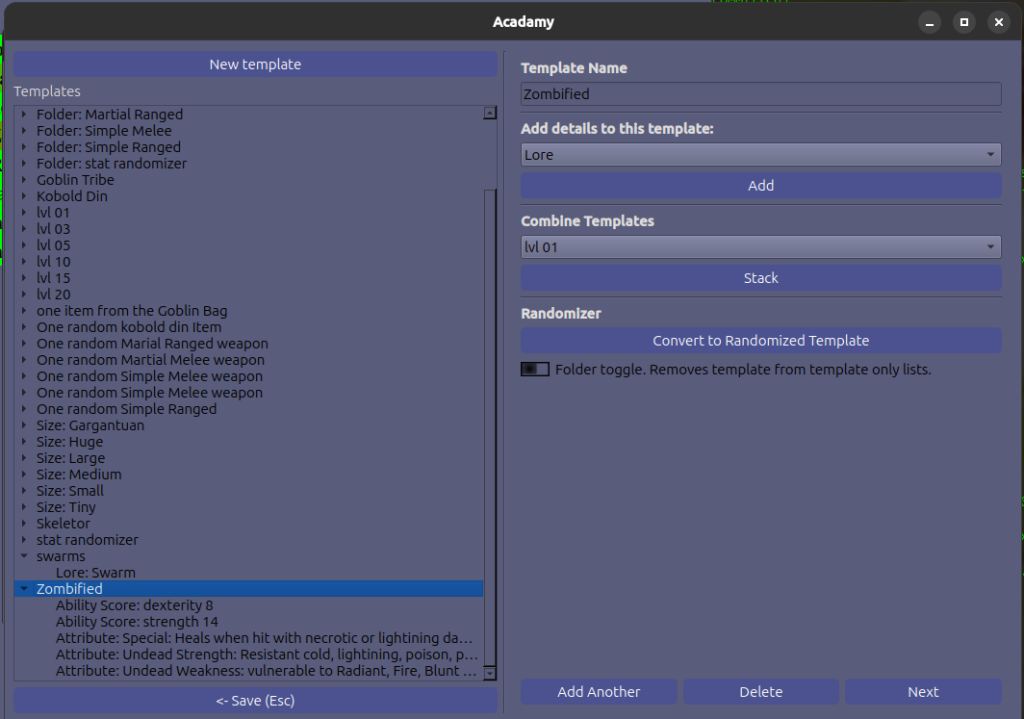
This is a set of two specific Ability Scores being set to a specific number, and three Attributes that would be applied to anything the template was attached to.
There are a lot of templates in here ready to use. So you can mix and match them. I’ll explain how to throw together your own creature in a different section.
So is this a better approach then the usual encounter builder? It’s a little more flexible and has a few more tricks.
As a reminder these templates don’t get applied specifically to monsters. They can be applied to any “item” inside the vault. Which is just where we keep stuff to be used in our encounters later.
To apply a template we go to the vault and then click the New Item(The Shop) button. Which opens up The Shop:
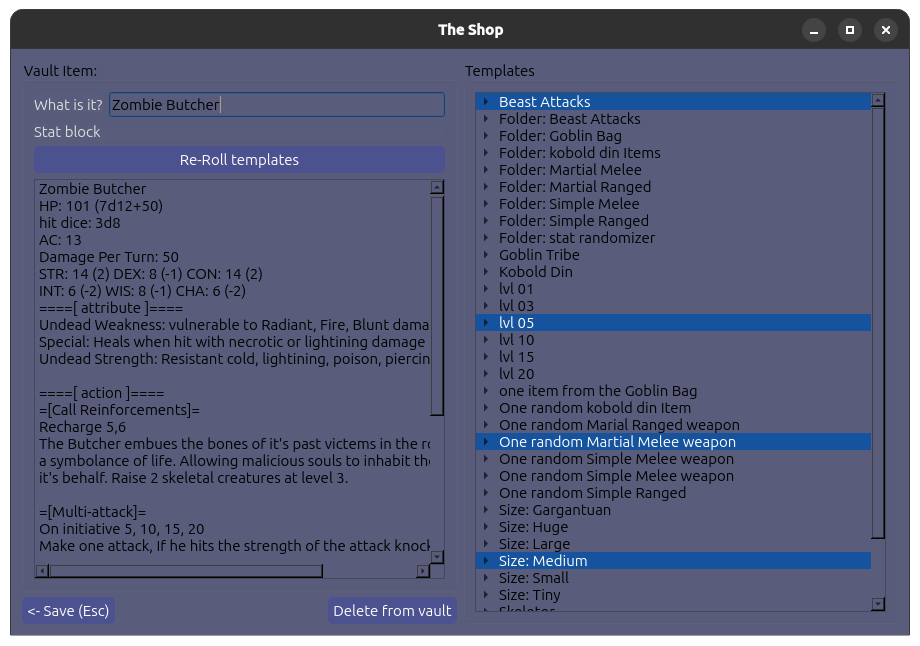
Again if you’ve already got something to work with. You can copy text directly into this text box on the left and click save. And your done. No need to use templates here. They are extra.
Templates
If you want to use my built in templates ideally you’ll want to:
- Pick a lvl template for automatic HP
- Pick the “stat randomizer” to get random stats instead of calculating your own.
- Pick some other templates that do things such as add a random weapon or apply a template that zombifies or seleton-izes your creature.
- Lastly hit the re-roll templates to re-generate new random stat-blocks until you find stuff you like. (Or directly selecting what you want out of a folder in the templates area)
- Make any edits on top to the stat block when your done.
- After this point you don’t want to re-roll anything as that will erase any customization you have added.
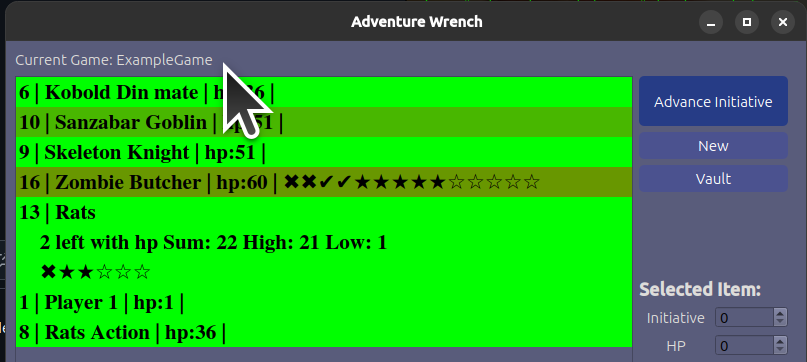
Many of us run multiple games. You’ll see here at the top there is an label saying “Current Game: default”. And down at the bottom a button that says “Switch Game”. But there are no controls for making a blank new game. So this is a small tutorial on that.
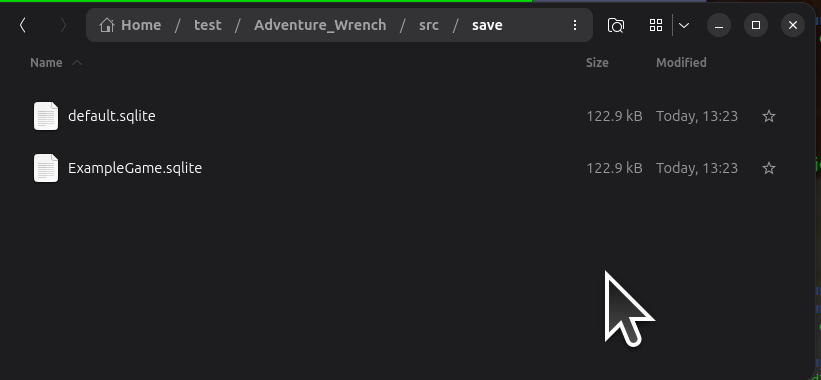
- Find out where your save files are.
- The “Switch Game” button will open a file selector dialog where your saved games are saved. Copy that location, open a new file browser and navigate there.
- Close Adventure Wrench.
- Make a copy of default.sqlite and rename it to the game name for your current game.
- If you remove default.sqlite entirely a blank database with no templates will be automatically generated. But that may not be what you want.
- Make a copy of default.sqlite and rename it to another game name you plan to be running. You can copy default.sqlite and make as many copies as you desire.
- Re-Open Adventure Wrench and click “Switch Game” button and select the game you want to work on. The game name from the file should be displayed at the top instead of “default”.